Showing posts with label Spring. Show all posts

Tuesday, May 25, 2010

Letter X is for Xylophone

We are almost done with the Alphabet!! Letter X was a really difficult one, but we found some great ideas on the Internet. X is for Xylophone! First we made a Xylophone using toilet paper rolls...this is not a Xylophone that's really going to make music but the idea is to create, use your imagination and have fun! This is how we did it:

PAPER ROLL XYLOPHONE


We used 4 toilet paper rolls (We made the rolls each time smaller. The 2 littlest ones, are the part of the third and fourth roll. You can use scotch to close them)


All we needed was:

  • Toilet paper rolls
  • Paint
  • Glue
  • Jumbo sticks
  • Needle
  • Yarn
  • Beads ( if you like)


    Before painting, I made a little hole in the toilet paper rolls. Now we can "sew" them together after they are painted.
    My daughter painted each toilet paper rolls and the sticks with a different color.


    We sewed the toilet paper rolls using the beads in this step. 
    She glued the jumbo stick on each roll (you can  match it or let your child be original...mine wanted to be creative. That's OK with me!)

    You can leave it like this and have a mobile, but we glued it on a  wrapped shoebox cover and my daughter wrote the word Xylophone all by herself! This was for me the best part of this project... :-)


    WATER BOTTLES XYLOPHONE

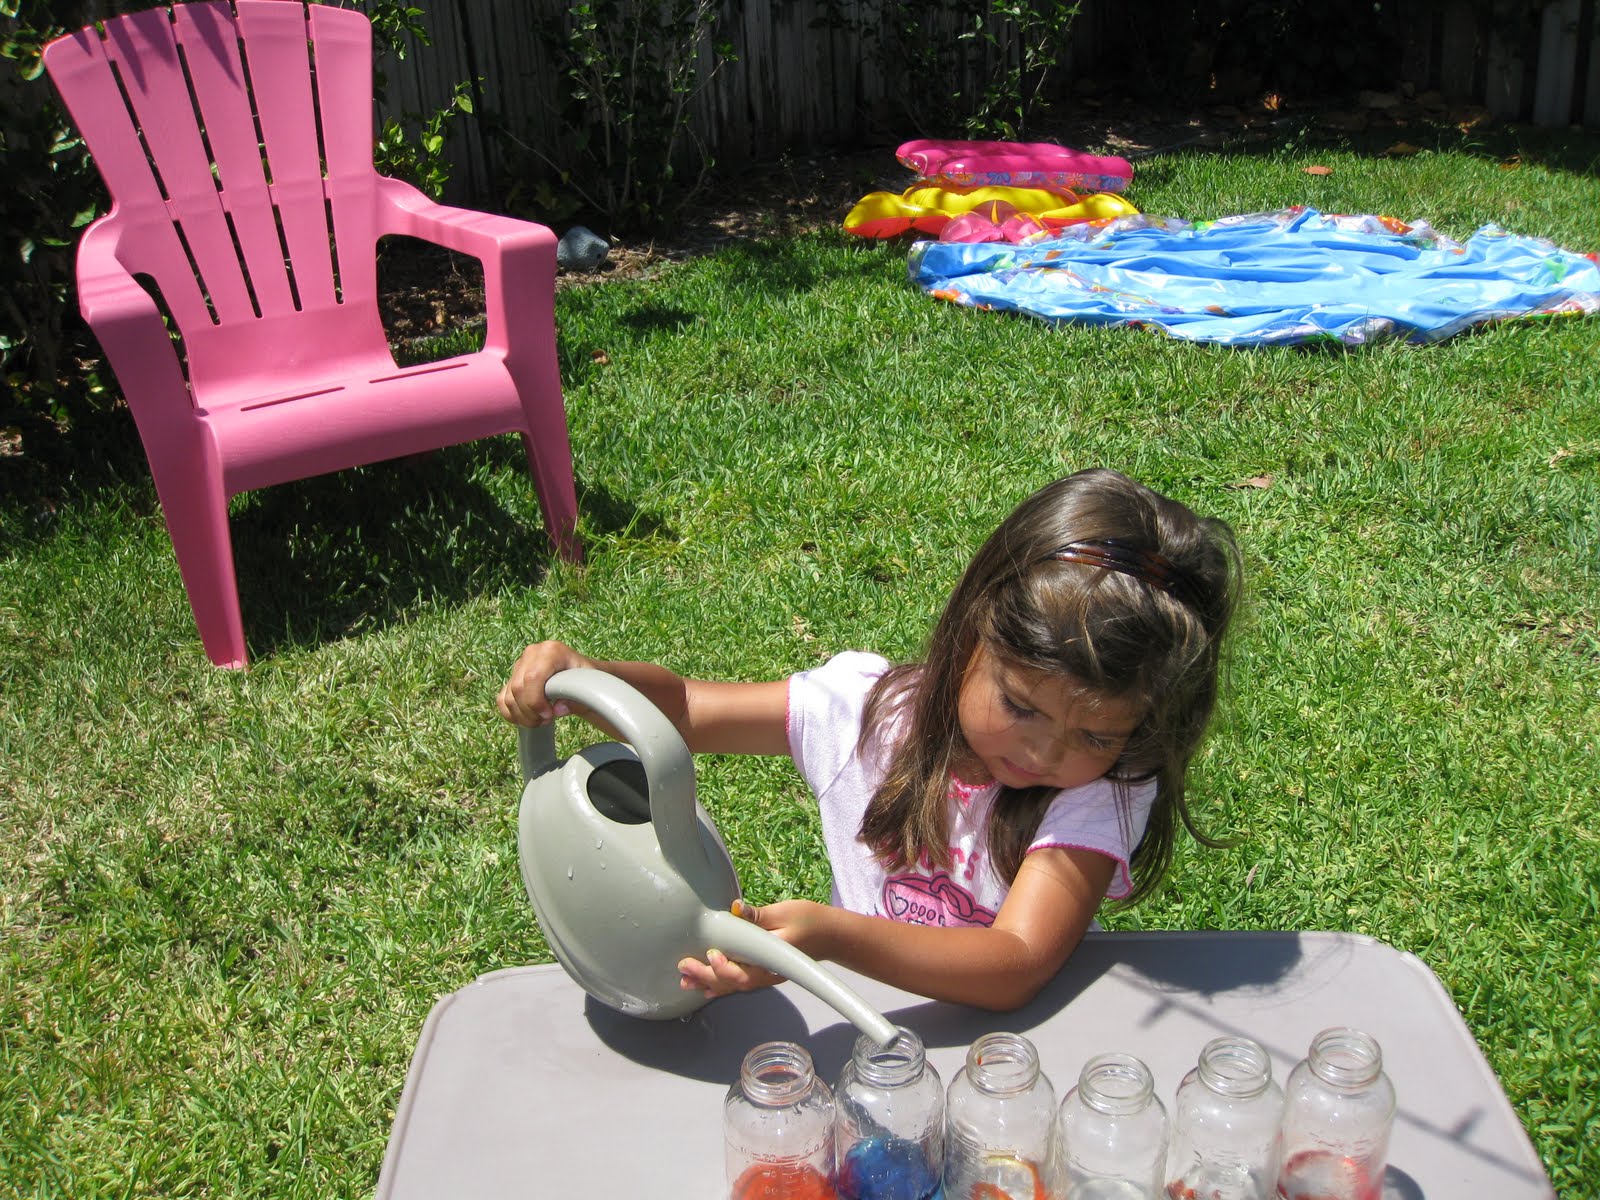
    Another type of Xylophone (that actually works!) is this one! My daughter really loved this one! We used 6 glass bottles, water and food coloring.

    You just need one drop of paint and water. Pour as much water as you want. You can leave them like that or put the lid on. And now just play! 


    Isn't it cute to see the faces of your children when they realize they have just created something so cool??


    Friday, May 21, 2010

    Letter W is for Watermelon!


    Al you need for these delicious Watermelons is a paper plate, some red and green paint, glue and some Watermelon seeds you can buy in any garden shop.

    My daughter loved this activity and reminded her dad that these Watermelon were not for eating...they are just pretend...I guess she said that because they look just like real Watermelons!

    Here is how you do it.

    Fold the paper plate in 2


    Open it again and paint the center red and the border of the plate with green paint


    Glue the seeds


    Fold it back a little bit...Enjoy your Watermelon!


    Friday, April 30, 2010

    Letter U - Umbrella and Universe with Coffee Filters (and the Earth)

    UMBRELLAS, UNIVERSE AND THE EARTH

    This was a tough week....letter U...Umbrella, Under, Underwear, Unicorn, Universe....
    I had an idea of making some umbrellas but my daughter preferred the Universe....until I told her that in order to make the umbrellas, we had to make it rain....hum, that's mysterious??? How???
    Here's how:
    First you need this template (download it by clicking on the image)

    Then you need:
    • Coffee Filters
    • Water
    • Scissors and Glue
    • Markers


    Umbrella

    Print the template and cut the umbrellas. Don't color them.


    Color the coffee filter with markers. Just scribble scrabble...
    These are the ones we made. (the blue one is for the Universe activity. You also need a green one if you want to make the Earth activity...)
    Put the umbrellas on a surface and put on top the colored coffee filter....
    LET IT RAIN!!!!
    She had so much fun!
    Wait until it dries and look at your umbrellas now...now they are colored!

    Since I was trying new techniques, we used food coloring to paint the background. You just need one drop and some water! I am definitely using this technique again!
    With regular paint and a Q-tip, we made some rain drops...oh, and the clouds are made of cotton balls
    We need the umbrellas with this rain!
    Done! U is for Umbrella!

    Universe

    Put the blue coffee filter on a blank paper (this one had a little blue on the background since I was trying the food coloring paint) and let it rain!
    Wait until it is dry. We used this coloring page of the planets (kaboose website) and my daughter used watercolors to color them. She cut them out and glued them...this is our Universe


    The Earth

    I know this has nothing to do with the letter U, but it is still Earth Day Month, and we have to recycle, so instead of trowing the colored coffee filters away, we made a nice craft with it.
    I don't have a picture of the green coffee filter but you do the same...just scribble scrabble a little bit green and make it wet. After it is dry, you cut it in little pieces and glue it on the blue one, making the continents. Here is the Earth. It is so easy to do, and you see the different blues and greens, just like in our real World!


    Thursday, April 22, 2010

    Recycled Nature Box and Carton Wallet - Earth Day Activities

    April 22 is Earth Day and we need to encourage our kids (and remind ourselves) that this is the only place we have to live on and that it is going to be for ourselves, our children and grandchildren. We have to take care of the planet, today and everyday.

    At school my daughter has learned a lot about recycling, and now she knows what belongs in the recycling bin and what not. For her Show and Tell, we made 2 things. First, something made with recycling material and something related to the Earth. Second, an activity I saw on Family Fun.

    RECYCLED NATURE BOX

    I first saw this activity here and thought it was a great idea since we could use recycling material while having a nice walk outside and enjoy our planet...our planet is so colorfull...sometimes we forget it!
    First we painted the egg carton with colors. (Ours was clear plastic)
    My daughter looked everywhere and we found a lot of items that matched the colors inside the box! She was so proud when she filled all the colors!

    We had:
    • Yellow, green and orange leaves.
    • Purple, yellow, pink, orange and red flowers
    • Blue, gray, white rocks
    • Green rosemary...that smells so good!
    • Brown dried coconut husk, stones and wood

    I found this activity on Coastal Girl' s blog and she has a lot of nice ideas and activities!

    CARTON WALLET


    I found this great craft on Family Fun yesterday and since it was Earth Day, we decided we had to do it.
    It's an activity for older children, but I made it, and my daughter drew something nice so she could give it to her teacher as a present. You only need a juice or milk carton, scissors and the template

    Hope you had a wonderful Earth Day!

    Friday, March 26, 2010

    S is for Spring, Snake and Spider


    Spring Snake


    Spring, Sun, Sand, Smile....Sounds like So much fun right??? And Sounds like a lot of Ssssss....


    This week we made a craft project starting with the letter S.
    We are a big fan of Teach Preschool which is a excellent website with lots of craft ideas and stuff you can do with your little one. She promotes excellence in early childhood education, professional development and practice. A website to bookmark. One of the ideas I saw on her page was this Kid-Safe Sweetest Snake!

    She linked it from this other excellent website called PreschoolRock.com, a network providing parenting information, craft and project ideas, activities, games, toys, books, nutrition, fitness and everything else related to children between the ages of three and five. You have to check it out!


    You can read on their page how we made it!
    The Plastic Egg Snake Preschool Craft
    We didn't have to use the drill. The eggs we found already had 2 little holes.
    I used a Crochet needle so my daughter could make the project herself.
    I put dried star pasta instead of dried beans for the rattling tail.
    We glued 2 eyes on it.
    We didn't cut the "tongue" of the snake. That way my daughter can wiggle the snake!
    She looooves her new pet!


    Spring Spider

    She also made this cute little Spider. The body are her hands...I love the Smile!
    Have a great Spring Break!!!