Thursday, April 22, 2010

Recycled Nature Box and Carton Wallet - Earth Day Activities

April 22 is Earth Day and we need to encourage our kids (and remind ourselves) that this is the only place we have to live on and that it is going to be for ourselves, our children and grandchildren. We have to take care of the planet, today and everyday.

At school my daughter has learned a lot about recycling, and now she knows what belongs in the recycling bin and what not. For her Show and Tell, we made 2 things. First, something made with recycling material and something related to the Earth. Second, an activity I saw on Family Fun.

RECYCLED NATURE BOX

I first saw this activity here and thought it was a great idea since we could use recycling material while having a nice walk outside and enjoy our planet...our planet is so colorfull...sometimes we forget it!
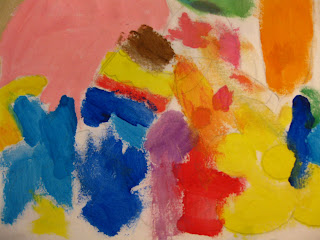
First we painted the egg carton with colors. (Ours was clear plastic)
My daughter looked everywhere and we found a lot of items that matched the colors inside the box! She was so proud when she filled all the colors!

We had:
  • Yellow, green and orange leaves.
  • Purple, yellow, pink, orange and red flowers
  • Blue, gray, white rocks
  • Green rosemary...that smells so good!
  • Brown dried coconut husk, stones and wood

I found this activity on Coastal Girl' s blog and she has a lot of nice ideas and activities!

CARTON WALLET


I found this great craft on Family Fun yesterday and since it was Earth Day, we decided we had to do it.
It's an activity for older children, but I made it, and my daughter drew something nice so she could give it to her teacher as a present. You only need a juice or milk carton, scissors and the template

Hope you had a wonderful Earth Day!

Friday, April 16, 2010

Letter U - Under the Sea Tank- (Recycle Earth Day)


Under the Sea Fish TankI was not sure if it was letter T week again or the letter U...

My daughter's teacher told me they would continue last week's activities about the Ocean, about Earth Day and that they would go on a field trip to the beach and do some research and snorkeling, so we came up with this
Under the Sea Fish Tank made with Recycled Materials to celebrate Earth Day!

(This is another variant of the Kijkdoos I explained last week...)

Working together was so much fun and this project was so easy to do!
All this was made with stuff I had at home....look at the details...

  • A shoebox...
  • This pattern I created and I want to share with you for download and use.
Under the Sea Fish Tank


NOTE:

You can download this template and use it anytime, but please don't copy it anywhere else without my permission. I worked on it and a simple link to this page would be a great way to share it. Thanks!!!


The Top Sign was made with the back of the shoebox. I cut a piece of the box before placing the blue tissue paper so the light would come trough. We glued 2 Goldfish crackers and my daughter wrote the word TANK.


Seastars - Under the Sea Fish Tank

Crab - Under the Sea Fish TankThe Red Crab is made with Farfalle Pasta (Bow Tie pasta) and red paint. Glued some eyes and done.

And the Sea Stars with Stelline Pasta.
The Sea Algae (Seaweed) was made with Raffia.


Popcorn - Under the Sea Fish Tank


In the corner you can see some Corn Kernels. These are our Sea Plants!

The Rocks are little stones from our backyard.

Glitter gives the water a bubbling effect.

Walnut - Under the Sea Fish Tank
The Sea Shells are Cavatelli Pasta and the Coral Reef are pieces of Walnut

Stones - Under the Sea Fish Tank
After we places everything inside the box, I used some thread to hang the fish.
Are you ready to go Scuba diving???

Pattern Color Under the Sea Fish Tank
We used these real cool markers called Elmer's Kids Arts and Crafts Paintastics Color Changing Markers
A great way to draw and create with no mess. These paint brush pens feature vivid, true color paint right in the brush, so there is no need for jars, water or separate brushes. The washable paint in the pens dries instantly for less smudging.

These color changing pens paint in one color, then can be changed to two more colors by using the color Magic Wand.

Simply rub the Magic Pen over the other 5 pens to produce instant color changes. Each pen can produce 3 different colors!

Monday, April 12, 2010

The Letter T - Train Station and more...all in a kind of "Television Box"

tekeningThis week we made a "Kijkdoos" (show box or diorama).
I grew up in The Netherlands, and I remember making these boxes with all kind of themes...and it was so much fun! And so simple to do!

This time we made 2 boxes. The first one was a Train Station, and the second one was just full of objects that starts with the letter T.


Train Station
Here is how I made this one.
All you need is:
  • A shoe box (the ones with a hole in front are the best)
  • Tissue paper
  • Glue
  • Scissors
  • My Train Template you can download here...Free!
train set kijkdoos c
I will draw more templates in the future! Hope you like it!

NOTE: You can download this template and use it anytime, but please don't copy it anywhere else without my permission. I worked on it and a simple link to this page would be a great way to share it. Thanks!!!


Step by Step:
kleuren knippen
Print the Template and let your child color and cut it.

tekeningplakken
Decorate the inside of the box as you wish. You can use anything, paint, stickers, etc. We used Tissue paper. It gives a colorful and nice effect.
rechts
Then glue the cutouts inside the box. You can back them with cardboard if they are too thin to stand by themselves. Remember to fold the paper and put only glue on the bottom.
Another important step is to work from back to front. Place the largest cutouts in the back and the smallest in the front. Since our box was too narrow, we decided to put the train on a wall...it didn't fit in the back where I thought would look good...anyway...
links
This is how it will look like...
knip T
Open some windows on the lid of the box. You get the best effect if you make two rectangulars, one in front and one back. But we made also the letter T to reinforce the letter of the week.
Letter T
Glue some tissue paper inside the lid and close the box.
klaar
...and take a close look!!!!


For the Letter T Objects Box.

Let your child look for little objects that start with the letter T and glue them or use tape to place them in the box.

We found:

  • Telephone
  • Train
  • Tape
  • Tomato
  • Tiger
  • Teaspoon
  • Turquese Crayon
  • Turttles
  • Teddybear
  • Triangle
Letter T Objects

This box has a flying Tiger inside...left...
links tiger
Center...
center tiger
Right...
rechts tiger
My daughter found this so funny....
Kijkdoos T
Have fun making yours! You can create so many nice boxes!!!!

Wednesday, March 31, 2010

Convenient Shopping

With a new baby at home my life has changed a little bit. Going shopping or going out was easy with my first born. I just took her with me, and voila. One hip for her, and the other for the diaper box! Now it is different....

  • My daughter goes half day to school, (store opens at 10, have to pick her up at 12, baby store is 40 minutes away...)
  • She needs to take a nap in the afternoon. When she wakes up, we just want to have fun, and not be in a store! (Of course)


But I need diapers! One 3 year old, one infant in a very heavy car seat, my bag, a diaper bag and of course the "here mommy, take this" stuff...Now what?


Searching the internet the other day, I found on Amazon a very easy way to buy baby essentials and actually save!


You get

• Free 2-Day Shipping on all diapers, wipes, and formula sold by Amazon

• An additional 15% savings through Subscribe & Save, our auto-delivery program

• Favorite brands like Pampers, Seventh Generation, Huggies, and Similac


The Subscribe & Save program offers an extra 15% off and free shipping on items you routinely use and keeps them coming every one, two, three, or six months. You can change your delivery schedule or cancel at any time.


I think this is the solution to my problems! Has anybody tried it before??? Please let me know! I am going to check it out!


This is the ad I found.


Friday, March 26, 2010

S is for Spring, Snake and Spider


Spring Snake


Spring, Sun, Sand, Smile....Sounds like So much fun right??? And Sounds like a lot of Ssssss....


This week we made a craft project starting with the letter S.
We are a big fan of Teach Preschool which is a excellent website with lots of craft ideas and stuff you can do with your little one. She promotes excellence in early childhood education, professional development and practice. A website to bookmark. One of the ideas I saw on her page was this Kid-Safe Sweetest Snake!

She linked it from this other excellent website called PreschoolRock.com, a network providing parenting information, craft and project ideas, activities, games, toys, books, nutrition, fitness and everything else related to children between the ages of three and five. You have to check it out!


You can read on their page how we made it!
The Plastic Egg Snake Preschool Craft
We didn't have to use the drill. The eggs we found already had 2 little holes.
I used a Crochet needle so my daughter could make the project herself.
I put dried star pasta instead of dried beans for the rattling tail.
We glued 2 eyes on it.
We didn't cut the "tongue" of the snake. That way my daughter can wiggle the snake!
She looooves her new pet!


Spring Spider

She also made this cute little Spider. The body are her hands...I love the Smile!
Have a great Spring Break!!!

Wednesday, March 24, 2010

Easter Garden Flag Decoration

In our street lives a lady who has these very cute Garden Flags and she changes them everytime there is a celebration, holiday, or change of season. Now she has an Easter Flag and my daughter really loves it.

I looked it up on internet to see if I could find one, but I found myself with 2 problems...one, Easter is next week...two, they are so expensive! (and even more if you ask for faster shipping).

So, why not make one ourselves...this was the best idea ever for a beautiful day like today's! We had so much fun in the garden! And the flag, one of a kind!


Here is how we did it:


What I used was a old bed sheet as canvas. I googled for some Easter Rabbits Coloring Pages and this one was the one I liked and tried to copy it on the fabric. (If you find it difficult to draw it yourself, just make a bigger scale print and trace it)


After I copied, I grabbed an old box and used some painters tape to hold it.

Some paint, brushes and an apron....and let your child be creative...I promise you, you will see the most beautiful garden flag EVER!


This is our New Easter Garden Flag!


I loved the detailes...look at her signature with a spider next to it and the ladybug!